First experience- linocut
On week 5 I had introduction about Linocut at the Fine Print Workshop. Step by step, I learned the process of creating Linocut prints. Also, material include: tracing paper, linoleum, ink and tools is cutting tools and roller.
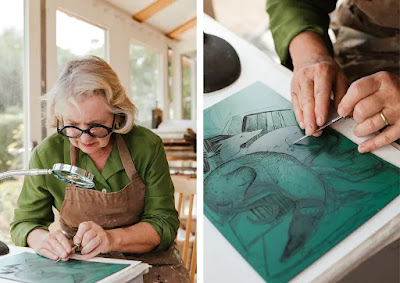
I began by sketching my project, is consist for the main material wood and shape root. Using trancing paper and a pencil, and transferred my drawing on carbon paper.

Then, I used carbon paper to transfer my design on the linoleum, I began cutting the linoleum, using cut tools, I cut carefully, because it is very sharp tools. I start from the main shape, I cut carefully along the clear line that I transferred.

Continuing with my linocut, I focused on cut a large area to create a bold 2d design. I decided use the black colour ink, it was my first time, and have to clearly see how it would be.


Exploring with this new technique I understand that need to add more deep elements to my design and using different colours ink, next time my plan, to make more linocut design and try to compare them on the one paper. Additionally, I am exited to continue experimenting with cutting techniques, this result which I got not my finish, I thought to add one more linocut shape like ceramics it will be more visual interesting 2D.


Good exploration of materials. I would develop this print further. Look at the twisting lines on trees/ bark, how could you add these to the shape? Once you have your lino, your 'plate' , you can print in different colours, overlap prints, print on collaged backgrounds, have a look at the technique chine colle for ideas.
ReplyDelete